3 Easy Ways to Upgrade Your Home… Before The Holidays!
I’m a nester, it happens right before we host - anything. I turn into DIY Dolly and suddenly I know how to use a jigsaw. Luckily (for all our sakes), my husband knows my patterns and discourages it the best he can allowing me to settle comfortably into managing bite-sized upgrades…handled by a professional.
Clients often come to us once they’ve lived with their space long enough to want to refresh the entire home. Once they start feeling antsy about one area, the entire home collapses into a not-good-enough-for-company environment. Aesthetic design is all about changing the context of a space and knowing where boundaries lie so so you can avoid a full blown overhaul before family comes to town.
Here are a few inspiration-filled tips to get you settled into hosting without blowing the budget and feel settled before your next house guests arrive.

Upgrade Your Lighting.
If you’ve been with me for a while, you know how much I ADORE lighting. It’s the absolute easiest, most cost effective option for changing the feel of a room. Even by changing the bulbs to a proper wattage, you’ll have a whole new vibe. Here are a few tips:
Layered Lighting. Cans + wall sconces + table lamps = the perfect ambiance
*(Just make sure your bulbs are the same color temperature throughout! We recommend 2700k for a warm, soft light.)
Trendy Table Lamps. Easy and cost effective. Layer these in to stay trendy without breaking the bank. Check out a few of our favorites below!
Cut the Cords (literally). Hang any sconce you want on the wall without hardwiring! Incorporate battery-operated, LED light bulbs by simply removing or cutting the cord from your table lamp or sconce and screw in the new light bulb. Use the remote to turn them on and off. You can even change the lighting temperature! It’s my favorite new tip for adding lighting to the center of a room or installing a sconce on my own.

Get Yourself A Gallery Wall.
Gallery walls will never go out of style. They’re easier than ever with pre-packaged templates from sources like Framebridge and Art to Frame. When your room lacks a strong focal point or a large wall needs filling, pull in the pieces you haven’t found a home for just yet. It could be kid’s artwork (framed correctly, this looks great on a gallery wall!), handwritten letter, vintage photograph or even a handmade, quick swipe of black paint across a spare canvas.
In a real life example of my nesting habits, I redid my office over Thanksgiving to include a collection of my favorite postcards from traveling. It took me a while to figure out what to do with such small art pieces but after setting them in various sizes frames set in mats of all shapes and colors, I ended up with a room that ties both sentiment and style together. If you feel a room lacking cohesion, use the art wall as a way to tie colors, styles, and memories together.
And when you’re ready, our friends at Colorado Art Services will help you hang it! For more on layouts and designer how-tos, check out this article from CB2.

Replace A Rug (or two).
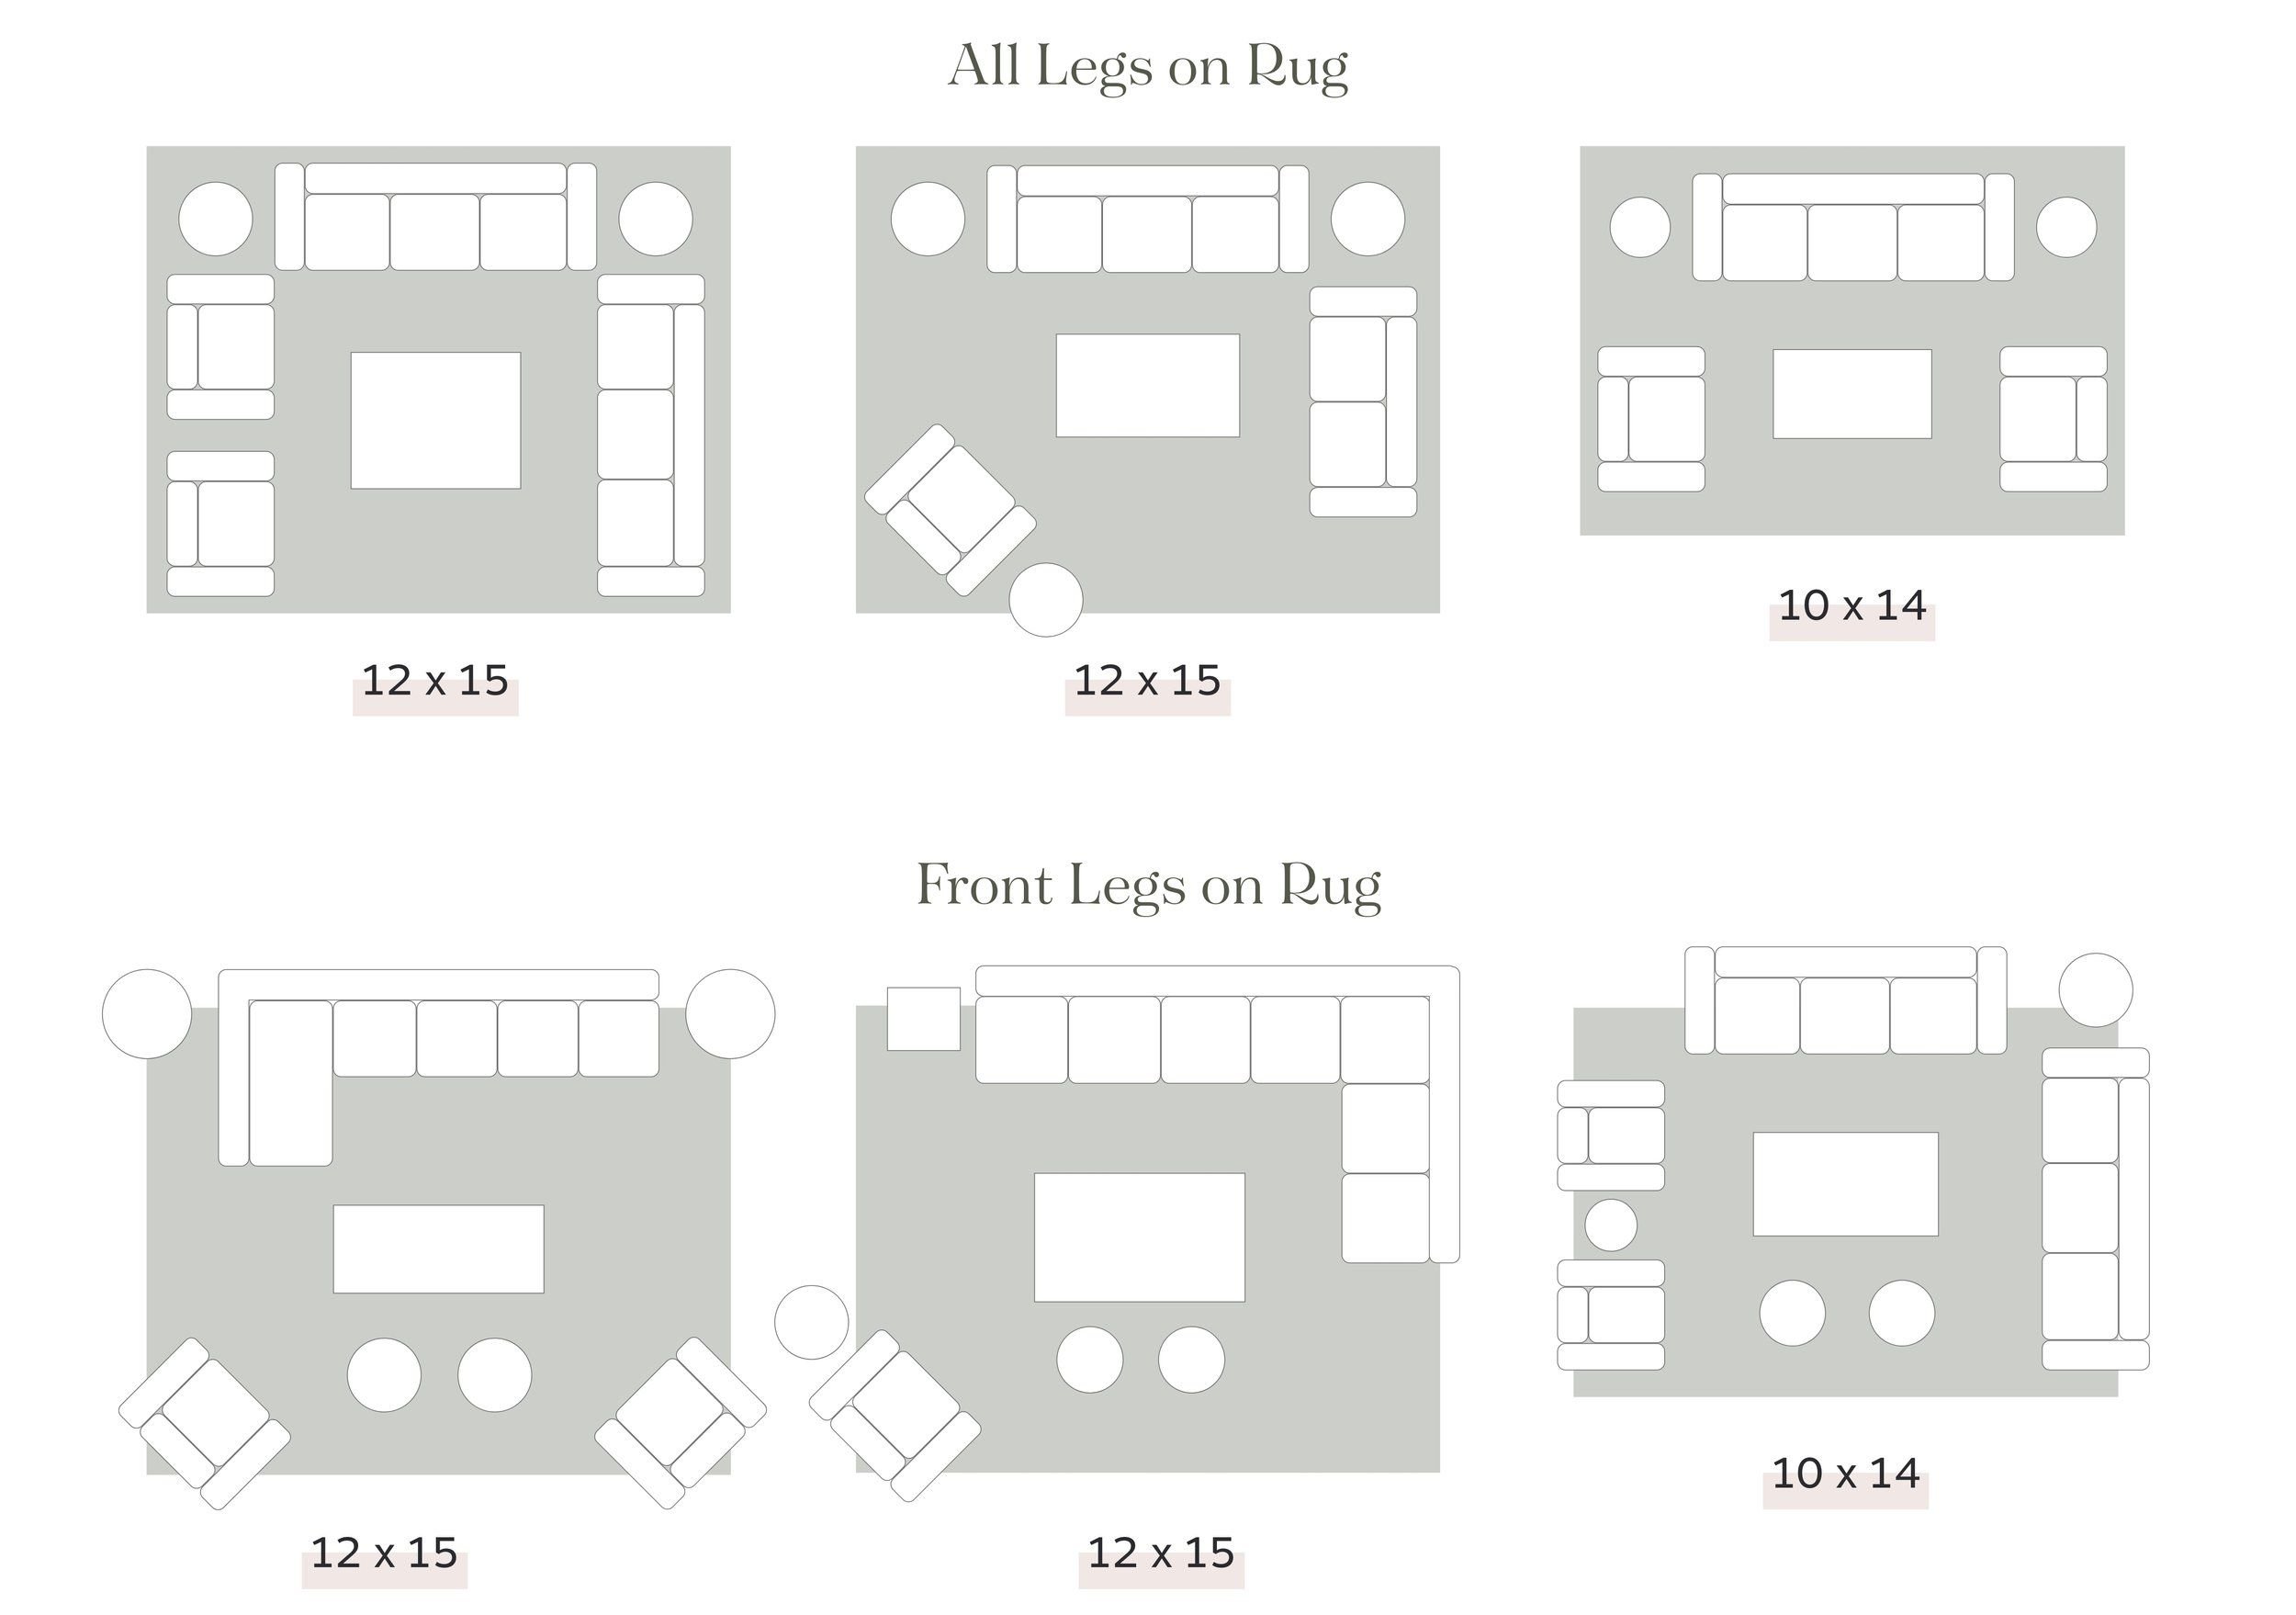
Floorcoverings are truly the foundation for your entire space. Scale matters, style matters, color palette matters. Find something that grounds the rest of your pieces and connects them both stylistically and physically. This means all furniture pieces should have at least 2 feet resting on the rug for the proper scale in order to fully define your room. To ground lighter furniture, pick a darker, moodier rug. To bring texture and light to a darker space, opt for a warmer, muted toned rug.
To scale properly, reference this handy guide from Scout & Nimble below. Then pop into our Rug Shop where all our favorites pieces live!
When in doubt, try our Design Day service for a fully customized single room plan to get your space in hosting shape!